Let’s suppose that you are working on a project that requires working on Saturdays. By default, Microsoft Project’s standard working week doesn’t include Saturday, so you might have found yourself struggling a bit with this! But don’t worry, we got you!
In this article, I will show you how to make Saturday a working day, whether you want Saturday as a working day for the entire project or just a single task.
Making Saturday a working day (for all tasks)
Step 1: Create a custom calendar
To create a new calendar:
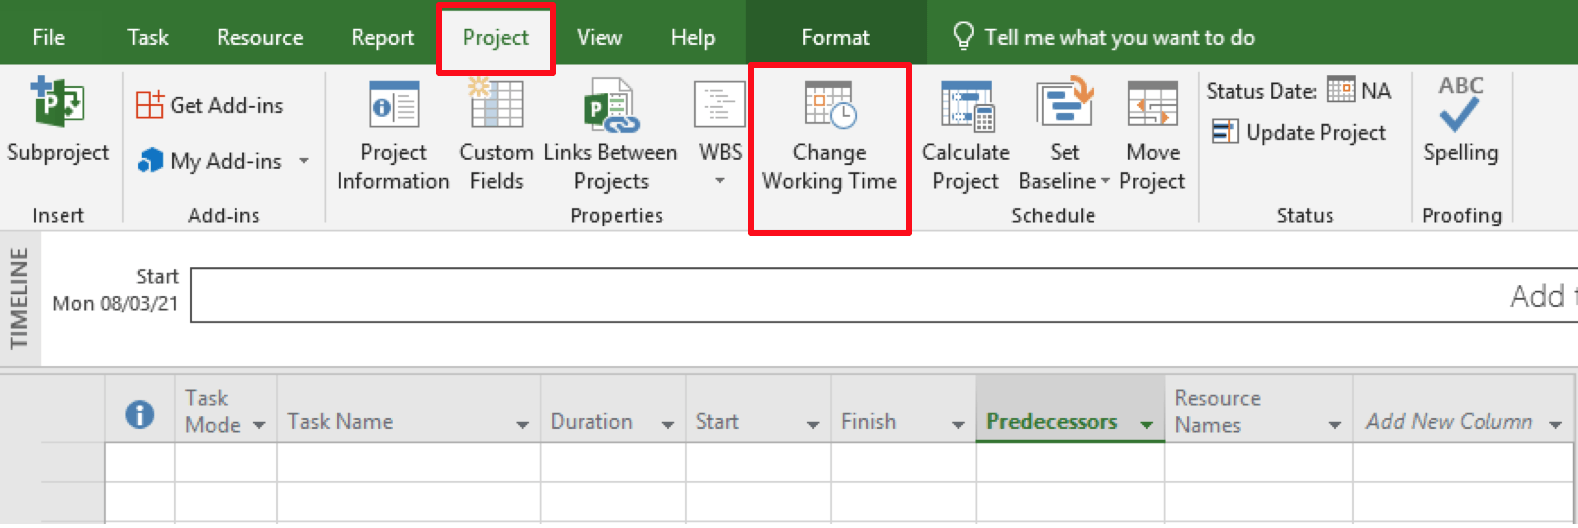
Click on Project → Change Working Time
In the Change Working Time window, click Create New Calendar:
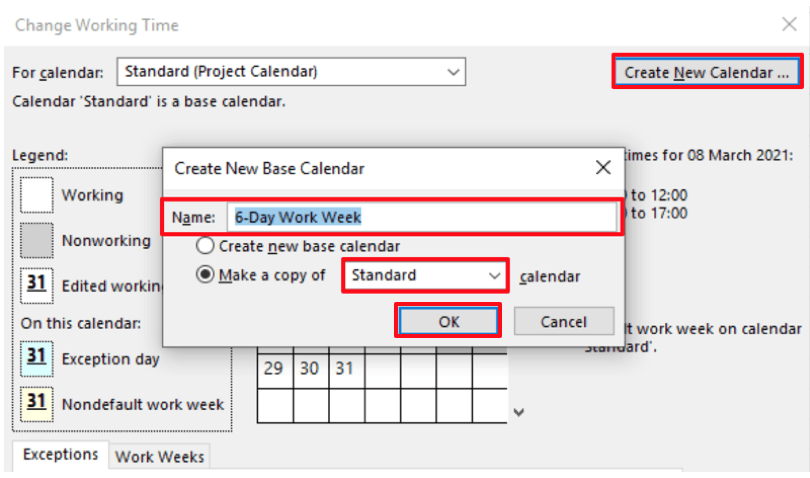
Give your new calendar a Name. I set “6-Day Work Week” as aNamein my example.
Now, select “Make a copy of” and choose Standard from the drop-down list. Press OK.
Step 2: Set working times for the new calendar
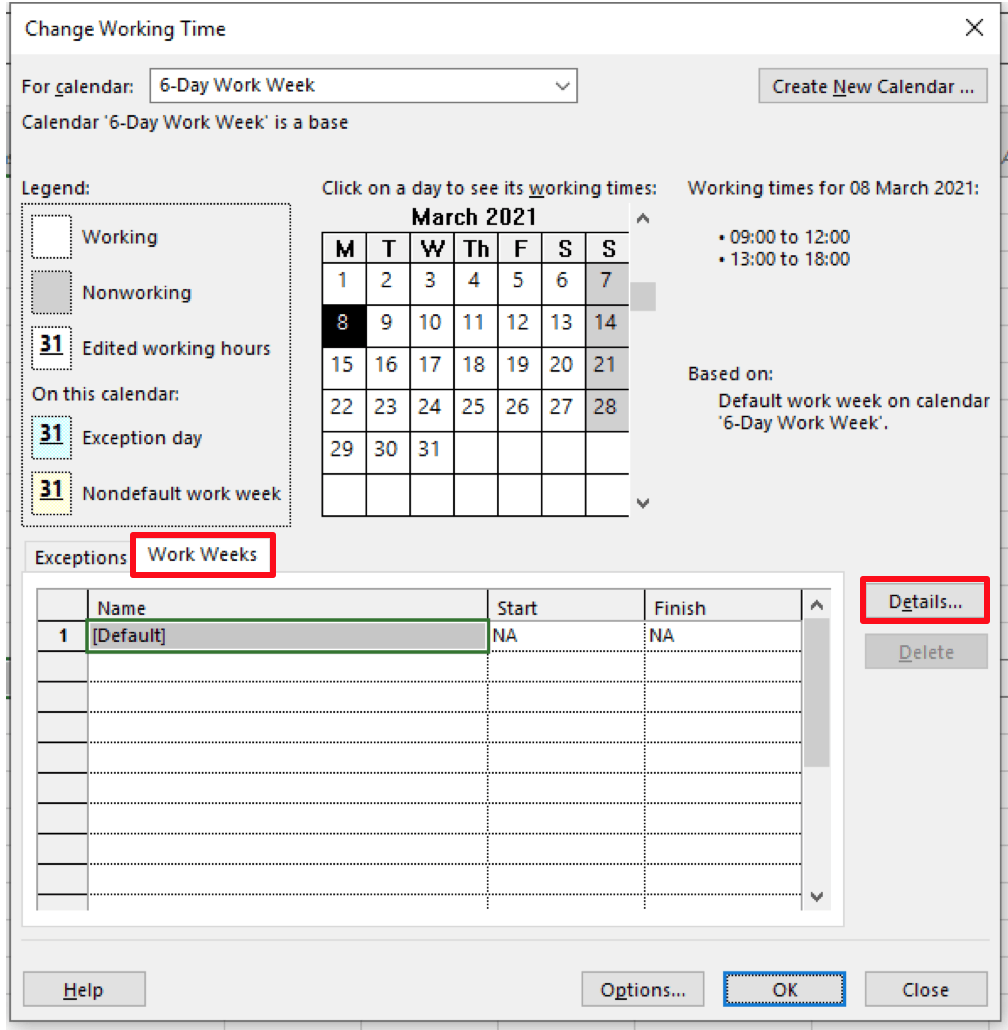
In the Change Working Time window:
Select the Work Weeks tab and then select Details.
In the Details window:
Select 6 days of work which are from Monday to Saturday.
Then, enter the specific working times you want to have for your working days. I set the daily working hours from 9:00-12:00 then from 13:00-18:00.
Press OK.
Press OK to exit the window.
Step 3: Customize your calendar to a 6-day calendar
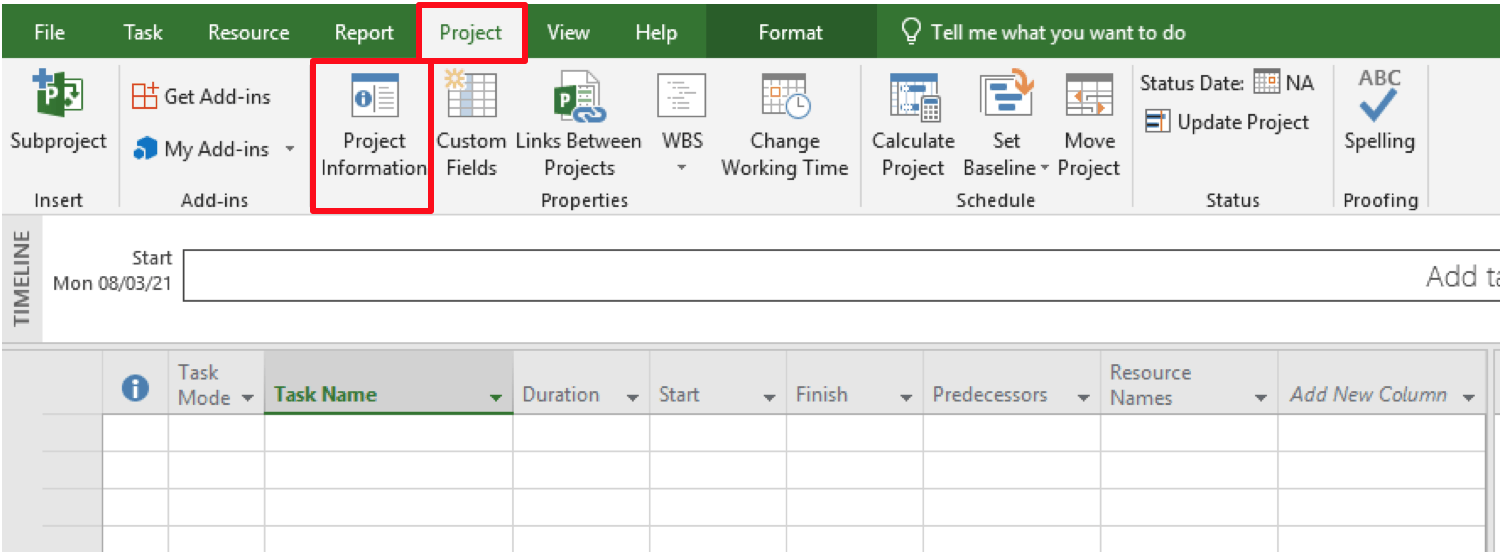
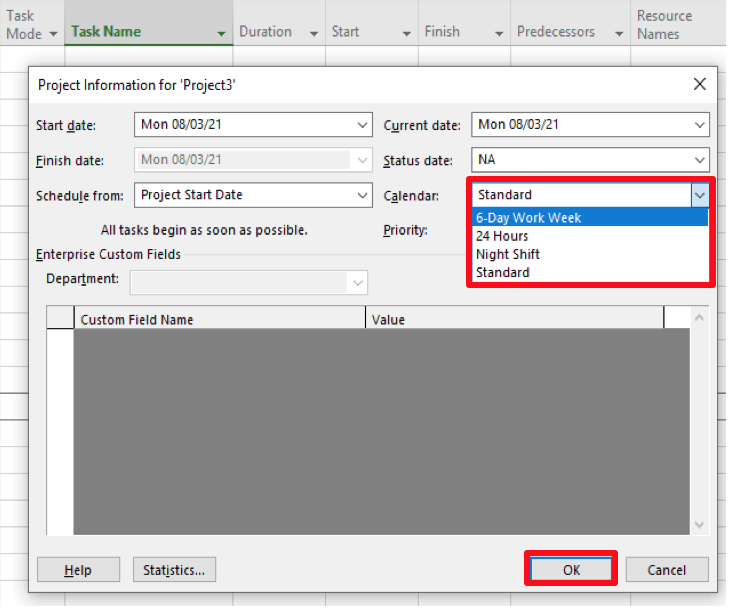
In the tabs ribbon, Click Project → Project Information:
In the Project Information window, go to Calendar and choose 6-Day Work Week from the drop-down list.
Press OK.
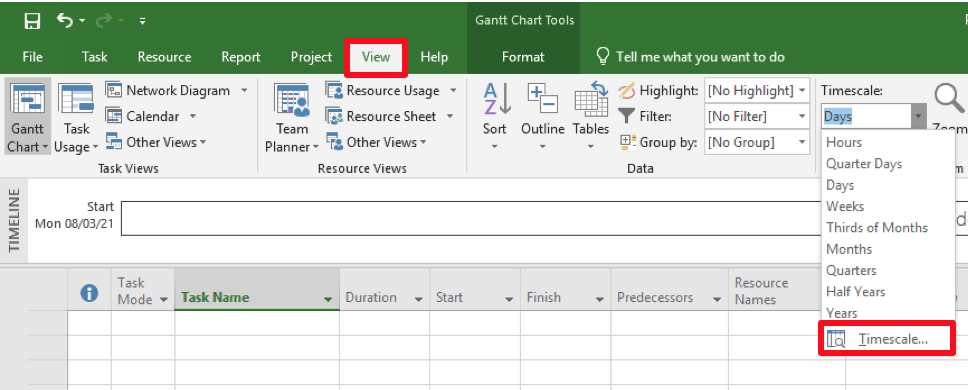
Step 4: Customize your project timescale to the correct calendar
In the tabs ribbon, click View → Select Timescale from the Timescale drop-down list:
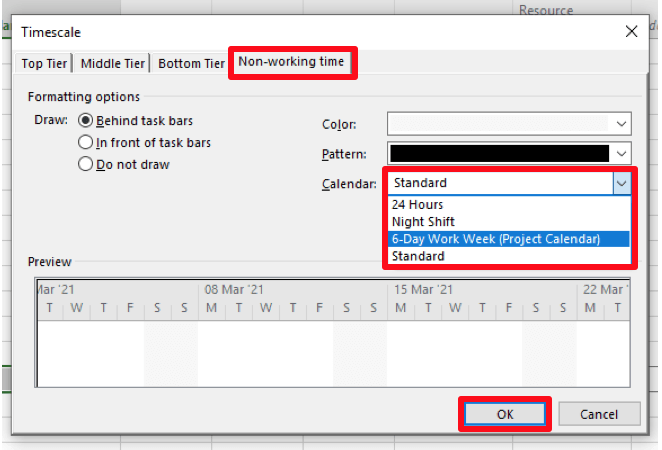
In the Timescale window:
Select Non-working time in the tab.
Then, go to Calendar and choose 6-Day Work Week from the drop-down list.
Press OK.
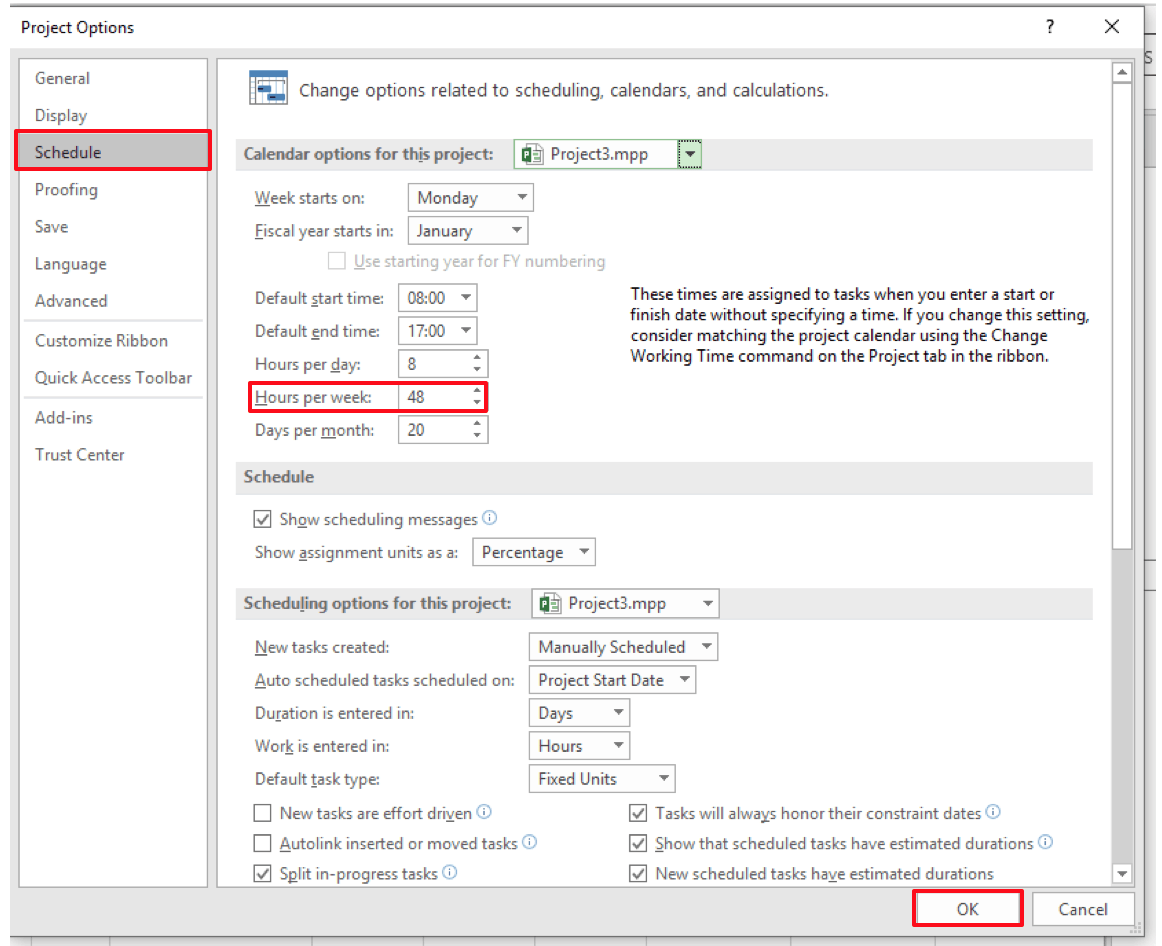
Step 5:Set the total working hours for the project
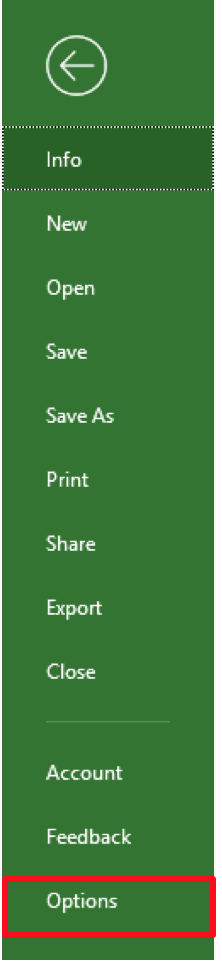
In the tabs ribbon, click File → Options → Schedule
After clicking Schedule, increase the Hours per week from standard hours to 48 Hours.
This will ensure that Microsoft Project is updated to the 6-day work week schedule which is 6 (days) ✕ 8 (hours work per day) = 48 hours.
Press OK.
Setting up a 6 day Work Week for a Project (For a single task)
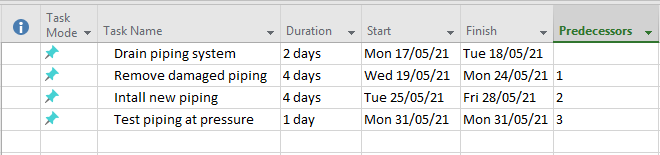
Step 1: Create a new project
Create a new project and include the Task Name and the duration.
I have set the following tasks in my example:
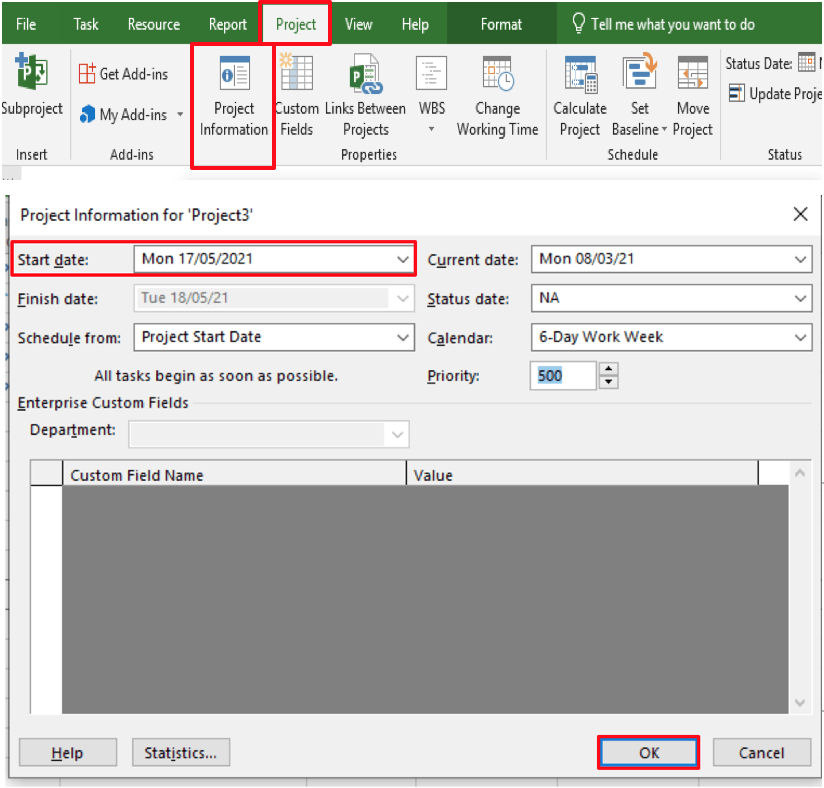
Step 2: Set the start date
In the tabs ribbon, click Project → Project Information:
In the Start date section, make sure to enter the date on which your project starts.
Press OK.
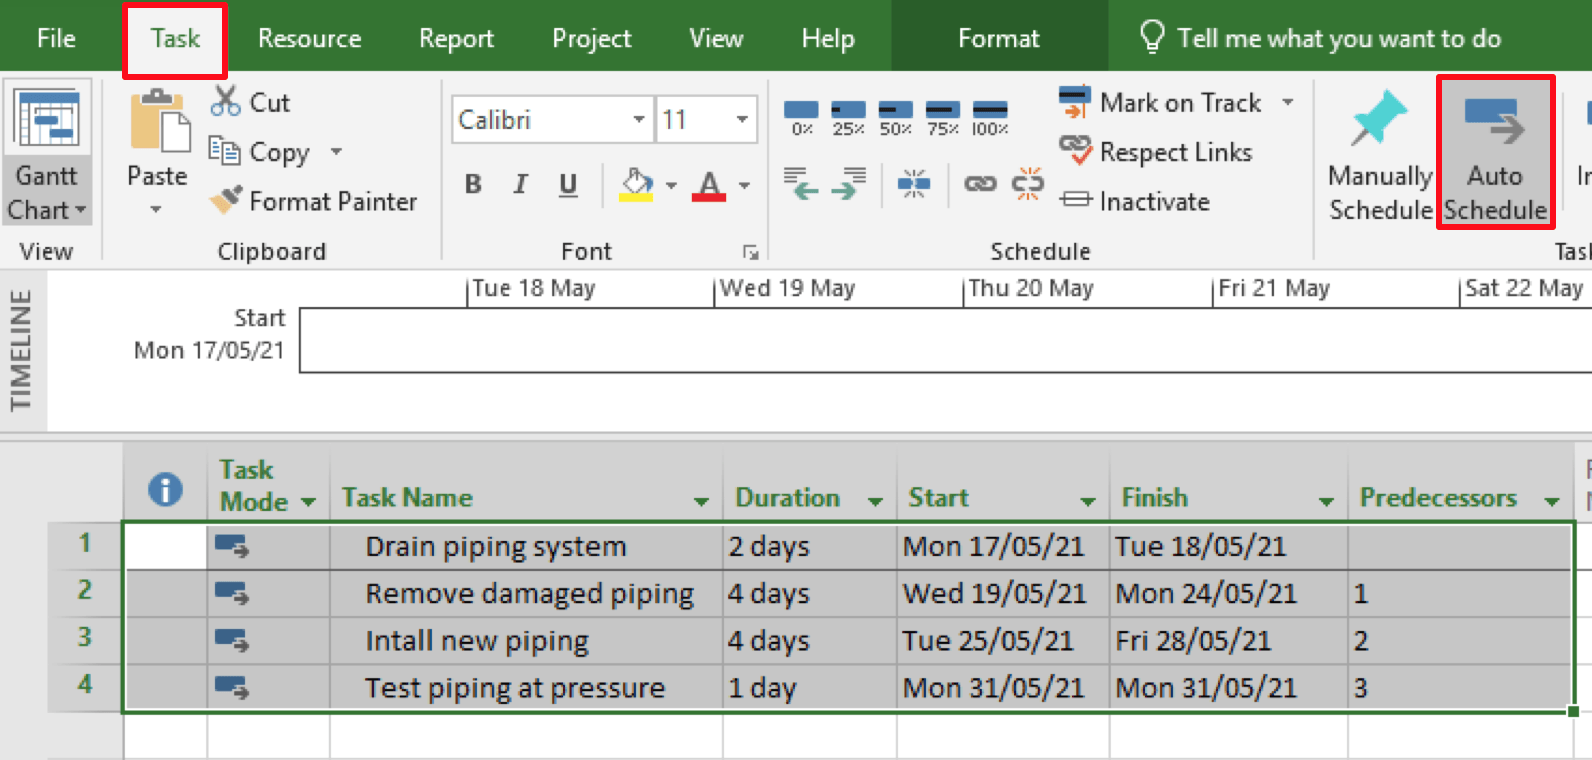
Step 3: Auto-Schedule your tasks
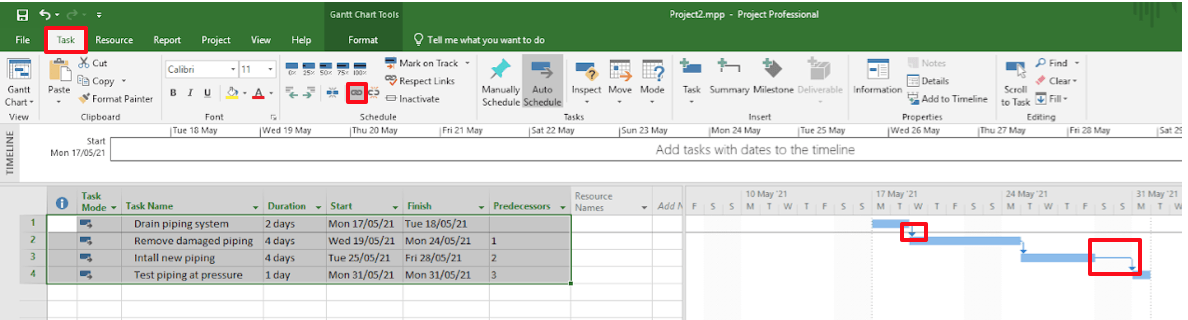
Highlight all of your tasks as shown in the image:
Then, go to the tabs ribbon, click Task → Auto-Schedule.
This will ensure that your tasks automatically follow the project start date according to the provided durations.
Step 4: Link the selected tasks
Highlight all of your tasks again
In the tabs ribbon, click Task → Link
You can see the linking arrows in the image below. This will ensure that a new task doesn’t start until the previous one has finished.
Also, as you can see in the screenshot, that Saturday is an off day!
Step 5: Create a custom calendar
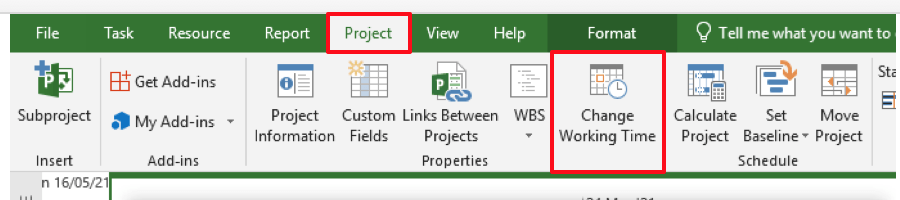
In the tabs ribbon, click Project → Change Working Time
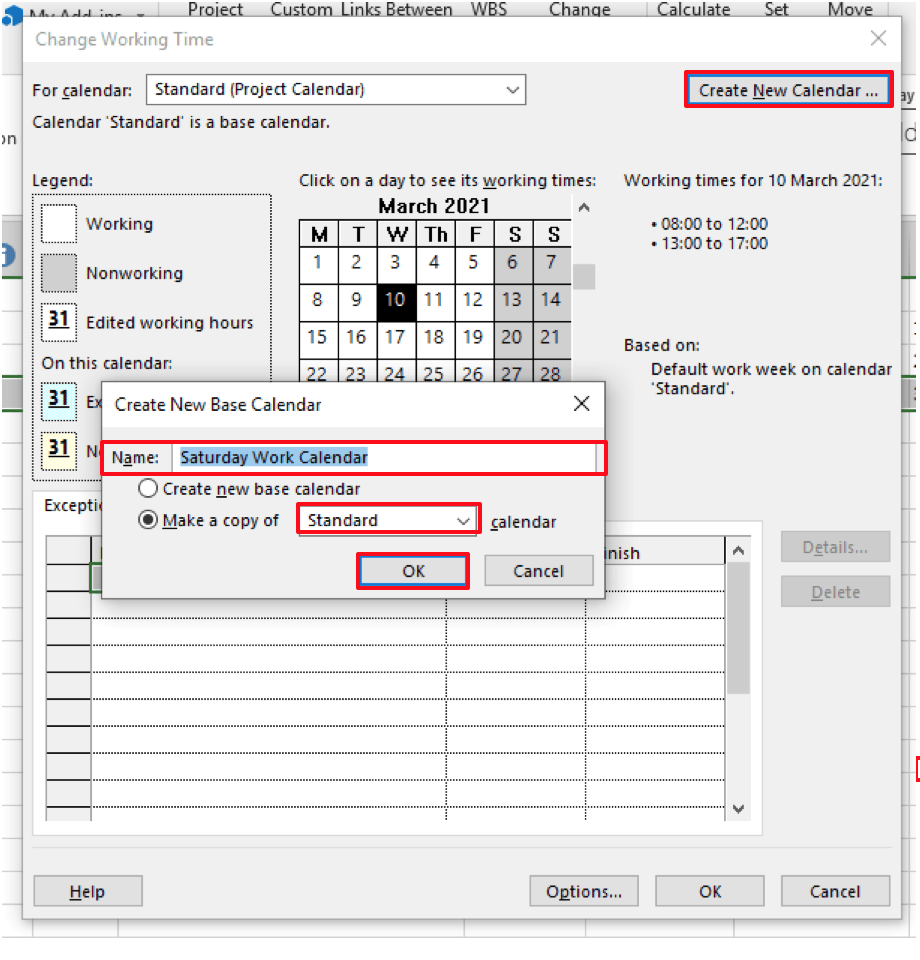
Now, Create a New Calendar:
Give your calendar a Name. I set “Saturday Work Calendar” as a Name in my example.
Select “Make a copy of” and choose Standard from the drop-down list.
Press OK.
Step 6: Set working time in the new calendar
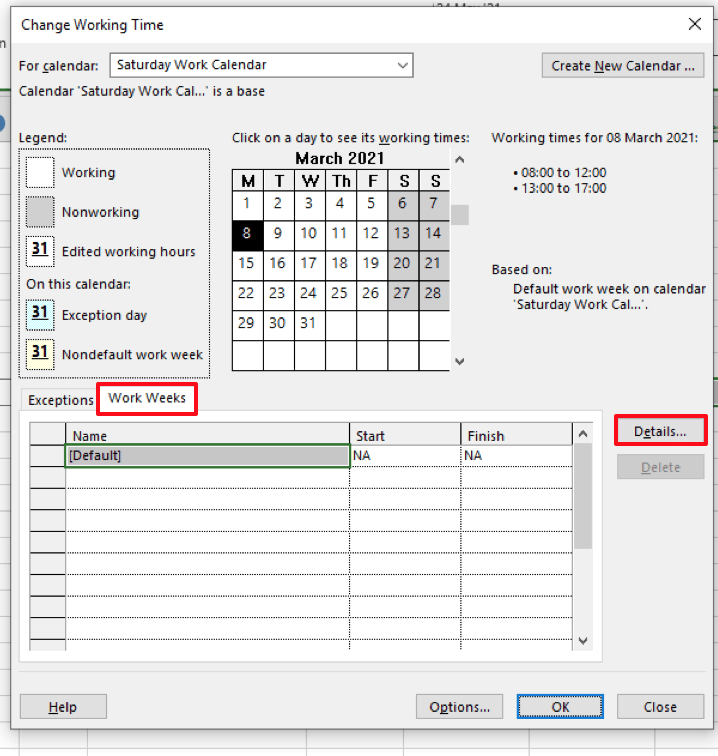
In the Change Working Time window:
Select the Work Weeks tab and then select Details.
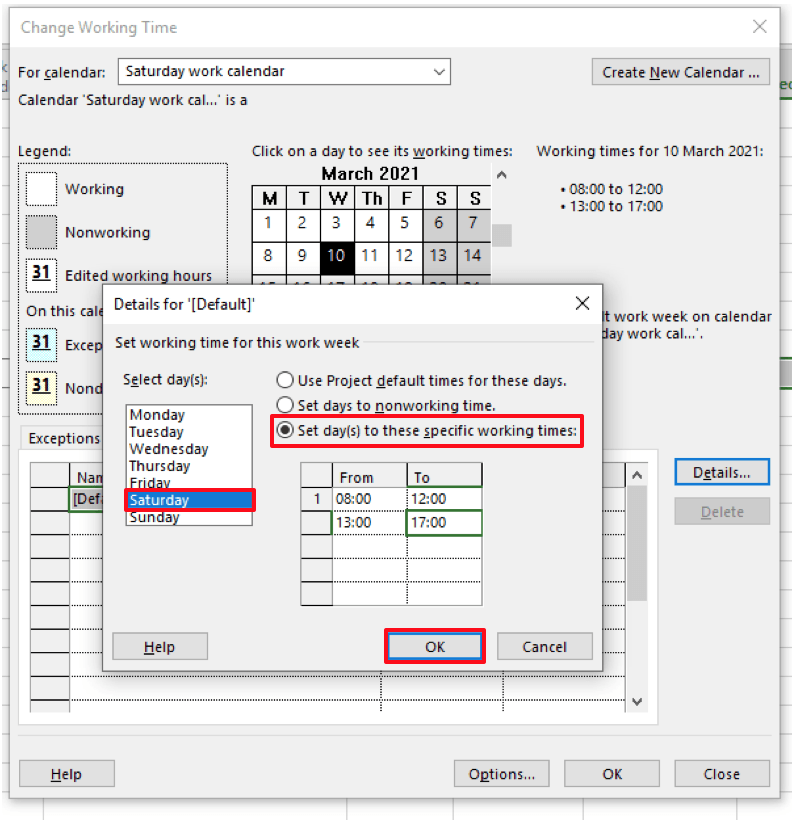
In the Details window:
Select Saturday as a working day
Enter the specific working times you want to have for Saturday. I set the daily working hours from 8:00-12:0 then from 13:00-17:00.
Press OK.
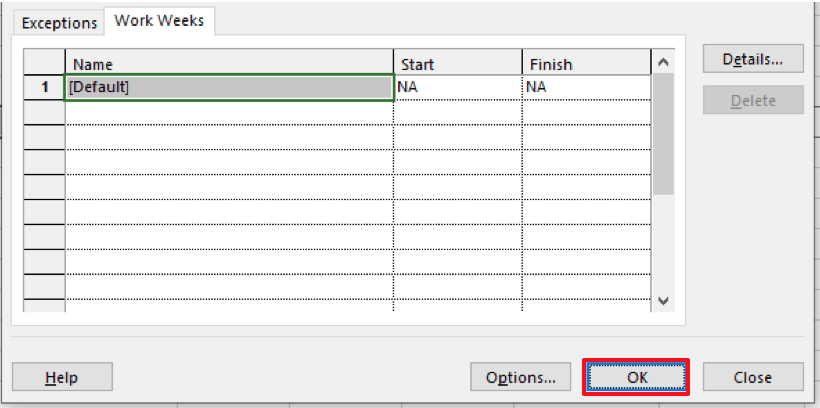
Press OK to exit the window.
Step 7: Link your tasks to the new calendar
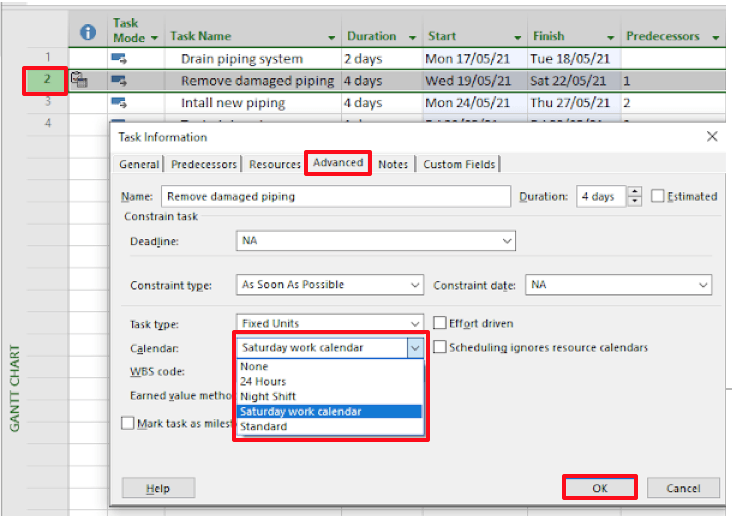
Double click on the task that has to be performed on Saturdays, and that will open the Task Information window. In my example, I double clicked task 2.
Go to the Advanced tab, and choose the calendar you have just created. In this example, it is the Saturday Work Calendar from the drop-down list.
Press OK.
Et voilà!
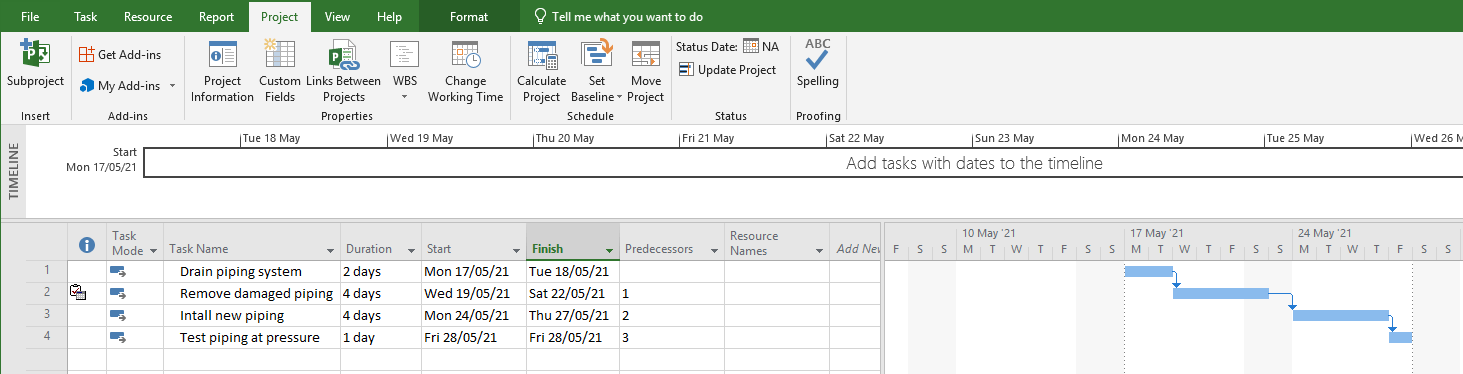
Take a look below! The project now will follow the standard calendar that is set in Microsoft Project. However, task 2 will now also take place on Saturday.
To summarize, Microsoft Project accommodates all of your project requirements in very simple steps. Now, you don’t need to panic when your industry requires you to work on a Saturday. Just follow the mentioned steps and you will easily set tasks that take place outside of the regular working days and hours.
Hi, I’m Adrian, a Senior Project Manager and the Creator of Tactical Project Manager, where I teach a pragmatic approach to project management. Led large-scale IT and business projects for over 10 years. My goal is to enable you to lead any project with confidence.
Shaped by feedback from 40+ technical managers who plan projects every day.
Finally, get a handle on team capacity planning!
Many of you have told me: “I have NO GOOD WAY to manage resource allocation” I could not let that sit. So, I locked myself into my basement for 6 months to build the SIMPLEST Resource Planner out there. It gives you instant visibility on workload and team availability.